If you love surprise drops, the Epic Games Store Holiday Mystery Giveaway is basically Christmas coming early. Epic teased a “major mystery game” for days, and honestly, most of us expected something big — but Hogwarts Legacy going free wasn’t on anyone’s bingo card.
Yes, you read that right. The blockbuster wizard RPG is officially free to claim for a limited time. And this move just kicked off a 17-day run of daily mystery games, which means we’re in for a pretty fun December.
Let’s break down everything you need to know in a clean, no-nonsense, casually professional way.
In This Post
What’s Going On With Epic’s Holiday Mystery Games?
Every year, Epic Games Store does a big winter giveaway, but this one already feels like their boldest yet. Instead of announcing the lineup early, they use mystery gift icons and reveal each game when the timer hits zero.
This year, the hype started during The Game Awards, where Epic hinted that the first free title would be a massive one. Turns out, they weren’t joking.
Hogwarts Legacy Is Now Free — Here Are the Details
For a game that dominated sales charts and social media when it launched, seeing Hogwarts Legacy as a free title is wild — in a good way.
Free Game Info
Game: Hogwarts Legacy
Platform: Epic Games Store
Free Until: December 18
Yours Forever: Yes, once you claim it, it stays in your library
Event Type: Day 1 of the Holiday Mystery Giveaway
All you need is an Epic account. No subscription. No catch. Claim, click, done.
If you’ve been holding off because of price or backlog guilt, well… now you’re out of excuses.
Why Hogwarts Legacy Is Such a Big Deal
Even if you aren’t a hardcore Potter fan, you can’t ignore how successful this game was. It’s one of the bestselling RPGs of the decade, and the worldbuilding is ridiculously detailed.
Here’s why players loved it so much:
Huge open world packed with quests and secrets
Smooth combat with tons of spell combos
Character creation that feels personal
A fresh story not tied to the main films
Cozy vibes mixed with dark fantasy
Getting a game of this scale for free makes this one of Epic’s biggest giveaway wins to date.
How to Claim It (Takes Less Than 30 Seconds)
If you’re new to Epic or just need a quick reminder, here’s the simplest breakdown possible:
Open the Epic Games Store launcher or website.
Head to the Free Games section on the homepage.
Find Hogwarts Legacy and click Get.
Complete checkout (it’s $0.00).
Done — it’s in your library forever.
No downloads required upfront. You can claim now and install whenever you want.
What’s Next in the Mystery Game Schedule?
Here’s the fun part: 16 more mystery games are coming — one every day. The reveals usually drop at the same time each day, and Epic tends to mix things up:
AAA titles
Indie gems
Cult favorites
Surprise new releases
If this event started with Hogwarts Legacy, the rest of the lineup could get very interesting.
Should You Pay Attention to the Daily Reveals?
Short answer: yes.
Epic likes to get competitive during the holidays, and this year’s opener proves they’re going for maximum attention. If you love free games, discovering surprises, or padding your library, it’s worth checking in daily. Even if you don’t want every title, the chance of another big drop is high.
Final Thoughts
Epic Games Store just pulled off one of the biggest attention-grabbing mystery giveaways ever by making Hogwarts Legacy free. Whether you’re a longtime fan of the wizarding world or a casual RPG player looking for something fresh, this is a deal you shouldn’t skip.
Claim it, enjoy the magic, and get ready — because with 17 days of reveals ahead, December is about to be stacked with freebies.
FAQs
Is Hogwarts Legacy actually free?
Yes. Completely free to claim on Epic Games Store until December 18.
Do I keep the game forever?
Yep. Once you add it to your account, it stays there permanently.
Do I need to install it right away?
No. You can claim now and install later.
Will the future mystery games be as big?
There’s no guarantee, but starting with a AAA title is a strong sign that the lineup will be impressive.
Do I need to pay for an Epic subscription?
No subscription required. Just a free Epic account.
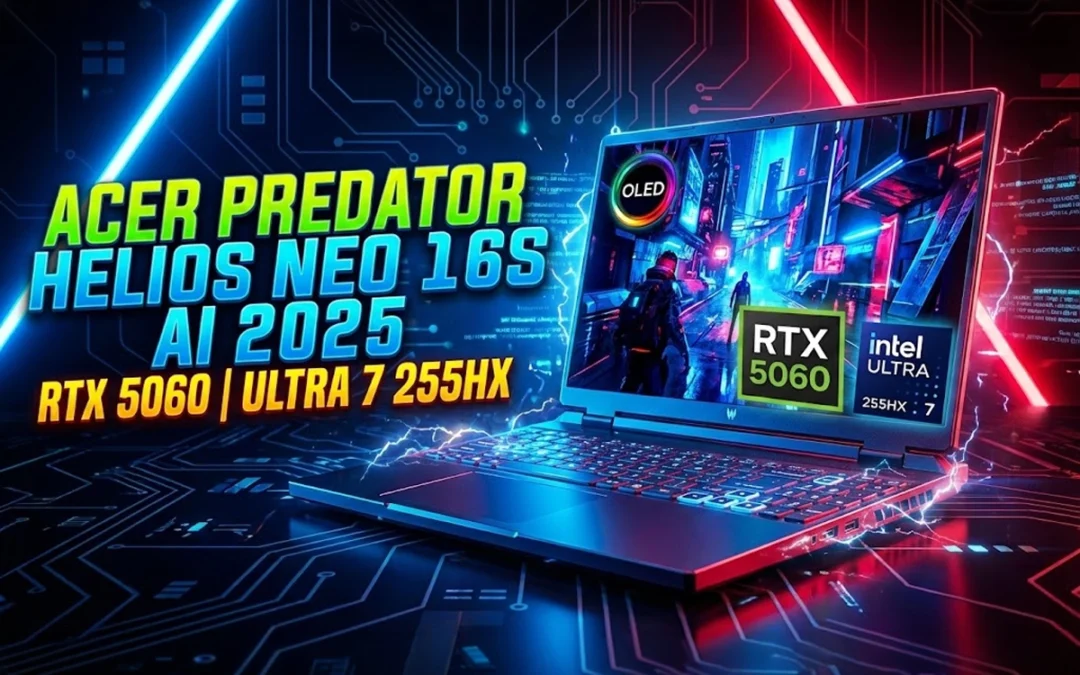
Acer finally fixed almost everything that held last year’s Helios Neo back. So here is Acer Predator Helios Neo 16S AI review. The 2025 Predator Helios Neo 16S AI is lighter, faster, cooler, and now ships with a true 2K OLED 240Hz panel — the kind of upgrade you normally don’t see in refresh cycles. After extensive testing across AAA titles, 2K gaming, productivity, thermals, and battery life, here’s the straight, reviewer-grade breakdown of what this machine does right, where it still lags, and whether it deserves your money.
In This Post
Quick Verdict (TL;DR)
If you want a lightweight, high-performance 16-inch gaming laptop with a flagship-level OLED display, strong CPU/GPU output, fast memory, and dramatically improved thermals, the Helios Neo 16S AI (2025) is worth buying. The only real compromises: 8GB VRAM, no webcam shutter, and occasional SSD write inconsistencies.
Last year’s Helios Neo was bulky, thermally inconsistent, and saddled with an unimpressive display. Acer cleaned up almost everything.
Slimmer chassis + metal lid and bottom panel
The 2025 model uses a metal top lid and metal base plate with a polycarbonate keyboard deck. Flex is minimal unless you intentionally push hard on the deck.
RGB Predator logo
The Predator logo glows in sync with keyboard lighting — a small but expensive-looking touch.
Improved exhaust & intake layout
Four exhaust vents (two rear, two sides) plus a large open-bottom intake dramatically improve airflow.
Hinge is smoother but not 180°
You can open it with one hand, but it stops short of fully flat.
Should You Buy It? Final Verdict for Gamers & Creators
This year, Acer finally delivered the Predator Helios Neo people wanted.
Buy it if you want:
A 2K OLED 240Hz panel
Strong 2K gaming performance
Major thermal improvements over 2024
Fast 6400MHz RAM
Lightweight chassis with big power
Skip it if you need:
More than 8GB VRAM
A hardware webcam shutter
Longer battery life for travel-heavy workflows
Final Verdict: The Acer Predator Helios Neo 16S AI (2025) is one of the best-balanced gaming laptops in its range, especially if you value OLED quality and consistent thermals. It’s an easy recommendation.
If you’ve ever used an AI image or video generator and felt like you were pulling a lever on a slot machine, this guide is for you. Most beginners hit “generate,” hope for a good output, then regenerate until something decent shows up.
That approach kills quality, wastes time, and makes you think AI tools are inconsistent.
This complete beginner’s guide shows you how to direct AI tools instead of gambling with them. You’ll take a single image and generate infinite camera angles, all with character consistency and full aesthetic control using Nano Banana Pro and other modern AI tools.
Let’s turn luck into a predictable creative workflow.
In This Post
What Is Nano Banana Pro Camera Control?
Nano Banana Pro camera control lets you create new camera angles, perspectives, and cinematic shots from a single foundation image. You direct the movement — not the model.
With the right workflow, you can generate:
Bird’s-eye views
Dutch angles
Macro close-ups
High angles
Over-the-shoulder shots
Dolly movements
Rack focus transitions
Slow zooms …and many more.
The key is starting with one strong foundation image, then guiding your variations through simple, precise prompts.
Step 1: Create the Foundation Image
Prompt: Frontal medium shot of image 1 designed for a dolly-in effect. Centered, balanced, snowy environment consistent
The foundation image is the DNA of your project. Every future shot and video will inherit its:
Character identity
Aesthetic and vibe
Lighting style
Color palette
Environment
If your foundation image is weak or inconsistent, all later angles will break.
Craft a clear vision: Who is your character? What world? What mood? What aesthetic?
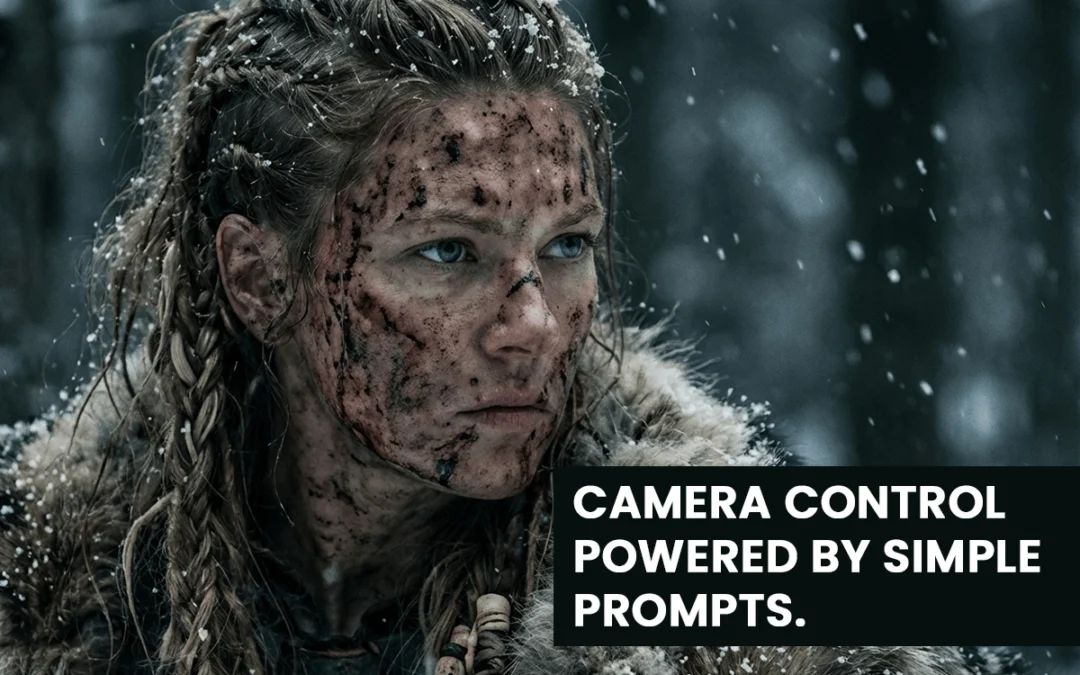
Example Prompt: A hyper-realistic female Viking in snowy woods — gritty, dark, green/white/gray tones.
Your prompt should define:
Character
Setting
Aesthetic
Tone
Once you get the perfect image, lock it in. That image now becomes your “reference” for every other shot.
Step 2: Generate Infinite Variations With Consistency
This is where most beginners fail.
They try to create new angles by rewriting huge prompts. That breaks character consistency.
Instead, you use the foundation image + a simple camera-angle prompt.
Why Simple Prompts Work
Nano Banana Pro already understands:
Lighting
Texture
Character features
Environment details
Color palette
Your job is not to restate all this.
Your job is to tell it the camera angle.
The Prompt Library (Over 40 Shots)
The creator in the video uses a free prompt library with 40+ camera angles. You don’t need to reinvent terminology like:
Dutch angle
Bird’s-eye view
Macro shot
High angle
Over-the-shoulder
Static wide
Dolly in/out
Handheld
Just pick the camera type → copy prompt → paste → attach foundation image.
Example: High Angle View Prompt
High-angle shot of image 1. Camera positioned above the subject, looking downward. Keep the same snowy environment and gritty style.
Attach your foundation image as image 1.
That’s it.
Example: Dutch Angle Prompt
Create a Dutch angle shot of image 1. Tilted horizon, subject in foreground, background slightly blurred, same lighting and environment
Nano Banana knows the term “Dutch angle,” so you don’t need technical descriptions.
Example: Macro Shot Example
Macro close-up shot of image 1 focusing on the eyes. Ultra-detailed skin texture, snow reflections, shallow depth of field.
Example: Bird’s-Eye View
Direct overhead bird’s-eye view of image 1 standing in the snow. Camera top-down, showing long shadow on the ground.
Nano Banana knows the term “Dutch angle,” so you don’t need technical descriptions.
Example: Macro Eye Prompt
Macro cinematic close-up of image 1’s eyes. Snowflakes clinging to eyelashes. Extremely shallow depth of field. Dramatic lighting.
Why This Works
The foundation image carries:
Character
Details
Clothing
Textures
Lighting
Scene aesthetics
You only describe:
Camera angle
Small contextual differences (snow, trees, direction of light if needed)
This gives you clean, consistent outputs every time.
Step 3: Turn Variations Into Cinematic AI Videos
Now that you have multiple angles, you can turn them into videos using tools like:
VO 3.1 (recommended)
VO 3.1 Fast (cheaper + nearly identical quality)
Nano Banana Pro also supports video editing workflows
Why VO 3.1 Fast Works Best
High cinematic quality
Supports first frame + last frame
Fast rendering
Low cost
Consistent movement
When You Need a First Frame Only
Example: slow zoom in on the Viking’s eyes.
Slowly zoom in.
Attach the macro-eye shot as the first frame.
When You Need First + Last Frame
Use both frames if:
There is a focus shift
The character moves dramatically
The environment must match exactly
You want to avoid character drift
Example: Rack Focus Scene
Blurry → sharp transition on the Viking’s face.
If you only provide the blurry first frame, the model invents a random Viking woman at the end.
But with both frames, the output matches perfectly.
How to Generate Perfect Video Prompts
You can use AI to help you write prompts.
Simple Workflow
Upload first frame
Upload last frame
Tell AI: Give me a text prompt for an image-to-video generator that moves from the first frame to the last frame.
Models like Claude, Gemini, or ChatGPT will generate a perfect camera-movement prompt.
Example Output
“A slow cinematic rack-focus pull from blurred foreground trees to the woman’s sharp, detailed face.”
That phrasing is correct — and you didn’t need to know the term “rack focus.”
How It All Comes Together
By now you understand the three steps:
1. Create a strong foundation image
The project’s visual DNA.
2. Create infinite variations using simple camera-angle prompts
The foundation carries the style. You describe only the camera.
3. Generate cinematic videos using first/last frame control
This gives you the exact movement and consistency you want.
This workflow lets beginners produce professional-level AI videos with zero guesswork.
Conclusion
Nano Banana Pro camera control changes everything for beginners. Instead of rolling the dice with AI generation, you now have a clear workflow that gives you predictable, cinematic, consistent results.
You can turn one foundation image into:
Dozens of photographic angles
Controlled cinematic movements
First-frame and last-frame–driven video scenes
Fully consistent characters across every shot
The limit truly does not exist. Once you master foundation images and camera-angle prompting, you can create entire AI films with complete control.
Your next step is simple: choose a vision, build your foundation image, and start experimenting.
Camera control is powerful, but it only works when your character stays consistent across every angle.
If your character changes from shot to shot, the entire scene breaks.
If you’re using Nano Banana Pro and still getting hit-or-miss results, you’re not alone. Most creators rely on weak prompts, vague instructions, and random guessing. Then they wonder why their images look nothing like the high-end examples flooding social feeds.
You deserve better. This guide gives you the exact expert-level prompt formulas you can steal, adapt, and use instantly for pro-grade outputs—based on the framework shown in the source article .
No fluff. No theory. Just practical prompts that deliver.
Let’s upgrade your results fast.
In This Post
Why Expert Prompts Actually Matter
Here’s the truth: Nano Banana Pro is powerful, but it’s not psychic. If you feed it vague inputs, it gives you generic images. If you feed it structured prompts, it performs like an elite artist.
According to the original guide’s breakdown on expert prompting (page 1) , the biggest difference between average users and advanced creators comes down to one thing:
Experts control variables. Beginners react to mistakes.
You get clean character consistency, stable lighting, correct anatomy, and brand-ready results when your prompt includes:
subject
context
camera language
style hierarchy
color and lighting control
composition rules
action or intent
You’ll see all of these wrapped into the expert templates below.
Quick Start: How to Prompt Nano Banana Pro Like a Pro
Before we hit the 10 expert prompts, here’s the stripped-down version of what Nano Banana Pro wants (shown in the guide’s “pro workflow”), page 1–2 :
Keep it tight. Every bracket is a lever you can control.
Now let’s move into the 10 upgraded expert prompts.
The 10 Best Expert Prompts for Nano Banana Pro
Each prompt pulls from the original list (pages 2–5) but is rewritten for clarity, power, and modern workflows.
1. Consistent Character at Every Angle
Nano Banana Pro is great at single images but falls apart if you don’t anchor identity. Fix that.
Prompt:
A recurring character: [description], consistent facial structure, same hairstyle and proportions, full-body rotation sequence (front, 3/4, profile, back), neutral pose, studio lighting, 50mm lens, clean background for clarity,hyper-consistent details preserved, professional concept art style.
Prompt Example:
A recurring character, an athletic woman in her 20s with a sharp jawline and short black hair. Keep the same face, same proportions, and same anatomy. Show her from the front, 3/4 view, profile, and back. Neutral pose, studio lighting, 50mm lens, clean gray background, high-resolution concept art style.
Why it works: You explicitly lock identity. No drift. No mutated anatomy.
2. Product Poster With Grid Layout + CTA Space
The source guide showcased layout-driven prompts (page 3) . Here’s the improved version.
Prompt:
Hero product shot of [item], centered grid layout, left area reserved for text, bold lighting for contrast, soft rim light, sharp focus on product edges, brand-ready color palette, clean background,
modern commercial poster style.
Prompt Example:
A matte black wireless mouse as the hero product. Use a centered grid layout with empty space on the left for text. Add sharp rim lighting, crisp edges, clean reflections, and a minimal background. Commercial poster style with brand-ready colors.
Use this for ads, Amazon assets, landing pages, or packaging drafts.
Based on the original “before/after transformation” prompt (page 3) .
Prompt:
Side-by-side layout: left “before,” right “after,” same character, same camera angle, controlled lighting, identical framing, accurate transformation differences, clear visual contrast but realistic execution,editorial demonstration style.
Prompt Example:
Two-panel layout with a before image on the left and after on the right. Same woman, same camera angle, same lighting, and same framing. Before version shows messy hair and tired expression. After version looks refreshed with clean makeup and bright eyes. Clear editorial comparison style.
Nano Banana Pro loves symmetry. This prompt gives it structure.
4. Cinematic Editorial Portrait (Mood + Grade)
The PDF’s cinematic prompt concepts (page 3–4) turned into a cleaner expert template.
Prompt:
Cinematic portrait of [subject], moody color grade, volumetric light, shallow depth of field, soft shadows, 85mm lens, editorial magazine energy, highly detailed textures, natural skin realism.
Prompt Example:
A cinematic portrait of a rugged middle-aged man. Use a moody teal-orange grade, soft volumetric backlight, shallow depth of field, and an 85mm lens. Keep natural skin texture and an editorial magazine feel.
Perfect for character sheets, talent profiles, and hero banners.
5. UI Screenshot Mockup (Text-Safe)
Want readable UI? You need structure.
Prompt:
High-fidelity UI mockup inside a clean device frame, flat overhead angle, proper spacing for text readability, sharp lines, accurate proportions, professional product design aesthetic.
Prompt Example:
Beauty marketplace mobile app screen inside a smartphone frame. Show a busy homepage with a search bar, category chips (Skincare, Makeup, Hair, Fragrance), and a promo banner with a model photo and discount text. Product grid with beauty items showing image, price, rating stars, shade dots, sale badges, and “Add to Cart” buttons. Include brand logo carousel and a “For You” section with tags like “Bestseller” and “Viral.” Bottom nav bar with Home, Shop, Cart, Wishlist, and Profile. Warm colors, glossy product shots, notification dots, slight screen reflections, detailed and active layout.
This prevents warped buttons and stretched panels.
6. Technical Diagram With Real Labels
According to page 4 of the PDF, diagrams with labels work only if you force clarity. Here’s the upgraded version.
Prompt:
Precision technical diagram of [object], labeled parts, minimalistic vector line style, clean white background, accurate proportions, sharp contrast lines, structured layout for educational clarity.
Prompt Example:
A precise technical diagram of a drone rotor system. Minimal vector line style on a white background. Keep accurate proportions and clear labeled parts. High contrast lines and a structured teaching layout.
Nano Banana Pro respects vector constraints when you define the style.
7. Style Transfer That Protects Identity
You want a stylized output without melting the face. This solves it.
Prompt:
[Subject], core identity preserved, stylized in [desired art style], same proportions, same facial landmarks, consistent lighting, clean contour control, high-resolution detailing, art-directed style transfer.
Prompt Example:
A portrait of a young woman with the same facial structure, eye shape, and hair as the original. Apply a painterly oil-brush style while keeping her identity intact. Use consistent lighting, high detail, and clean contours.
When you say “preserved,” the model listens.
8. 6-Panel Storyboard Strip
Inspired by the storyboard guidance on page 4–5 of the source blog .
Prompt:
Six-panel storyboard, sequential actions, consistent character design, matching camera lens across all frames, coherent lighting, film-style visual grammar, clean composition alignment.
Prompt Example:
A six-shot storyboard of a man entering a futuristic train. First the exterior, then walking up steps, scanning a ticket, doors opening, entering the train, and finally sitting down. Keep his design, outfit, camera lens, and lighting consistent across all panels.
This is the fastest way to go from idea to draft scene.
9. Viral Toy / Figurine Mockup
Social media loves these.
Prompt:
Cute collectible figurine of [character], stylized proportions, studio product lighting, soft shadows, glossy material finish, centered composition, commercial toy photography style.
Prompt Example:
A cute vinyl-style figurine of a sci-fi robot. Exaggerated proportions, glossy plastic, soft studio shadows, centered composition, toy photography style.
Great for merch previews or campaign teasers.
10. Realistic Portrait With Perfect Lighting
This is your “never fails” portrait formula.
Prompt:
Ultra-realistic portrait of [subject], three-point lighting, balanced highlights, soft shadows, crisp textures, clean color temperature, subtle specular detail, professional photography look.
Prompt Example:
A realistic portrait of a woman with curly hair. Use a three-point lighting setup with clean highlights and soft shadows. Warm skin tone, crisp texture, neutral background, professional photography look.
It produces stable, flattering results across subjects.
Pro-Level Prompting Tips That Actually Matter
The PDF included a troubleshooting section (page 5) . Here’s the sharper version—what you should actually do:
Tip 1: Use “preserve” language when you need accuracy
Identity, shape, and proportions stay stable when you explicitly protect them.
Tip 2: Stack clarity in three passes
Describe the subject
Describe the scene
Describe the structure
This fixes 80% of issues.
Tip 3: Short prompts outperform long rambling ones
Nano Banana Pro doesn’t reward essays. It rewards precision.
Troubleshooting: Fast Fixes for Common AI Failures
The original list (page 5) included the right issues. Here’s the faster, more actionable version:
Conclusion: Stop Guessing. Start Creating With Control.
Most people use AI like a slot machine. They hope the model magically understands their intent. You’re not doing that anymore.
With the templates and pro prompts in this guide, you’ll generate cleaner, sharper, more consistent outputs every time. Nano Banana Pro responds to structure. If you give it direction, it performs at an expert level.
Use these prompts. Refine them. Build your own library.
Your results will change fast.
FAQs
Can these prompts work across all Nano Banana Pro models?
Yes. Some styles vary, but the structure works everywhere. Derived from the source article’s universal template .
Do I need long prompts for better results?
No. Clear prompts beat long prompts every time.
How do I fix character drift?
Lock identity with anatomy, proportions, hair, and facial landmarks.
Can I use these prompts for commercial work?
Yes. They’re built for branding, product visuals, and content pipelines.
What’s the fastest way to improve my outputs?
Use the expert template. Then tweak lighting, style, and layout only when needed.
Finding the right geyser can feel like a winter project of its own. If you’re short on time (and patience) and need something that heats water instantly before your morning rush, this guide is exactly what you need.
I’ve personally tested, used, and reviewed multiple instant geysers—bought with my own money, no brand sponsorships, no hidden deals. My only goal is to help you choose the best instant geyser in India for 2026 that fits your budget and daily use.
So, let’s dive in and clear up the confusion between storage and instant geysers once and for all.
In This Post
Instant Geyser vs Storage Geyser: What’s Better?
If you’re wondering whether to go for a 15–25-liter storage geyser or a compact instant model, here’s the truth.
An instant geyser saves about 25% electricity compared to a storage geyser. It heats only the amount of water you actually need—no energy wasted on extra liters.
Example: If you need just 5 liters for a quick shower, an instant geyser heats only that amount. In contrast, a 15-liter storage geyser would heat all 15 liters, wasting both time and power.
However, don’t expect a star rating on instant geysers—most models don’t carry one due to their heating mechanism.
Power Element and Capacity
Instant geysers use 3-kilowatt heating elements, while storage models usually have 2-kilowatt elements. That extra power means faster heating.
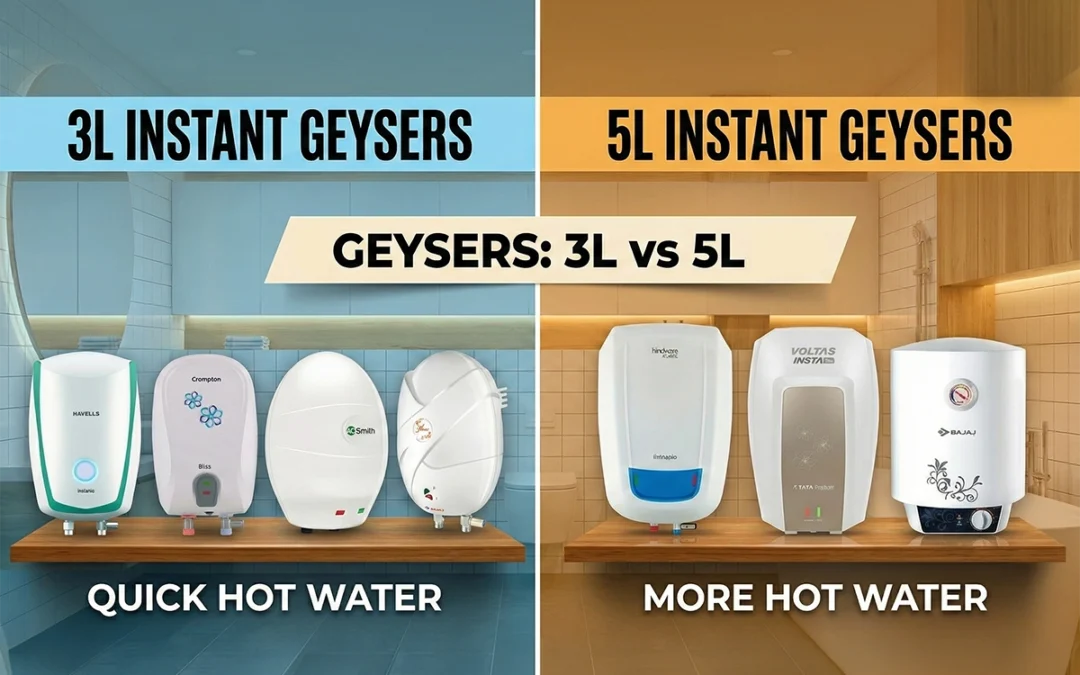
You’ll mostly find two capacity options:
3-liter geysers – Ideal for kitchens.
5-liter geysers – Perfect for bathrooms.
If you want to take full showers, stick to 5-liter units. Three liters simply won’t cut it.
Build Quality and Installation Tips
Before jumping into brand names, keep these facts in mind:
Most brands don’t provide a 3-pin plug or pipes in the box. You’ll have to buy and install them separately.
Always use a 16-ampere plug to avoid short circuits.
Don’t rely on “free installation” promises; many companies don’t cover all cities.
Top 3-Liter Instant Geysers (2026)
1. Havells Instanio 3-Litre Instant Geyser
Build Quality: Outstanding ABS outer body and 304-grade stainless steel inner tank.
Extras: Color-changing LED indicators, solid insulation, ISI certified.
Warranty: 2 years comprehensive + 5 years on tank.


 Review — RTX 5060 + Intel Ultra 7 255HX Fully Tested 2")
 Review — RTX 5060 + Intel Ultra 7 255HX Fully Tested 3")
 Review — RTX 5060 + Intel Ultra 7 255HX Fully Tested 4")
 Review — RTX 5060 + Intel Ultra 7 255HX Fully Tested 5")
 Review — RTX 5060 + Intel Ultra 7 255HX Fully Tested 6")
 Review — RTX 5060 + Intel Ultra 7 255HX Fully Tested 7")
 Review — RTX 5060 + Intel Ultra 7 255HX Fully Tested 8")
 9")
 10")
 11")
 12")
 13")
 14")
 15")