Fooocus Download & Install Guide (2025) – How to Run It Step-by-Step
In This Post
Introduction to Fooocus
What is Fooocus?
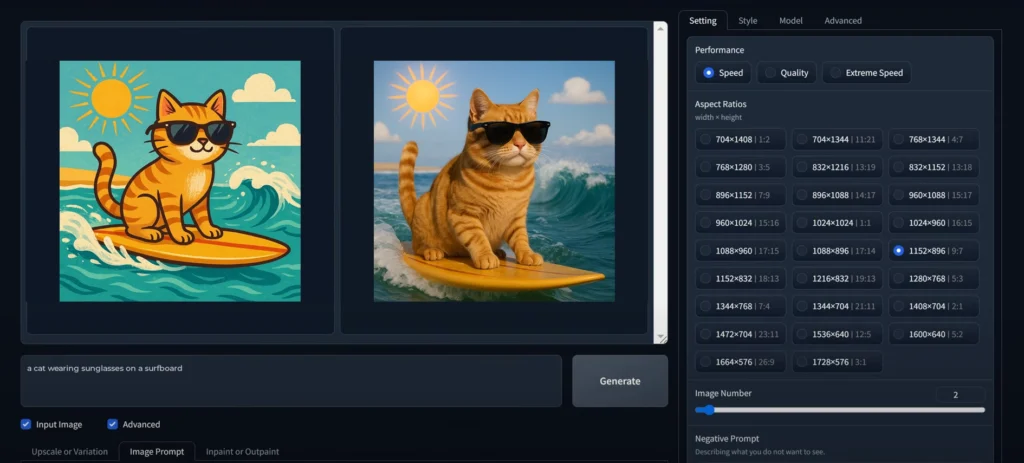
Imagine typing something like “a cat wearing sunglasses on a surfboard,” and a few seconds later, bam, it’s there. That’s Fooocus for you. Wild, right?
This little app is like having your own personal art wizard. It takes whatever you can dream up and turns it into an image, using AI behind the scenes.
It’s sort of like Stable Diffusion’s chill cousin. Less technical fuss, more “let’s make cool stuff.” Whether you’re just doodling for fun or need visuals for your next project, Fooocus steps in like, “Don’t worry, I got this.”
Why is Fooocus gaining popularity?
Things get interesting from here on out. It’s not just another tool; Fooocus is a quiet change in the world of AI art. What makes it unique? Incredibly easy. You download it, unzip it, and run it, and then you’re making art. There are no cloud logins, accounts, or payments. It’s yours, to keep on your own computer.
It stands out, which is why creators love it. It doesn’t have any filler. A simple process that works for everyone, even if they aren’t very tech-savvy. How about those who really use it? With your own tools, you can add your own models, change the speed settings, or even change the backend.
System Requirements for Running Fooocus
Minimum System Requirements
Before you go rushing to download it, hold up—your machine’s got to meet a few minimums. You don’t need a NASA computer, but Fooocus does need a bit of muscle to run properly, especially if you want your images fast and sharp.
Here’s what you barely need to get started:
- OS: Windows 10 or 11 (64-bit)
- CPU: Intel Core i5 (or AMD equivalent)
- RAM: At least 8GB (bare minimum)
- GPU: NVIDIA with at least 4GB VRAM (seriously important)
- Storage: 10GB free (you’ll want more later)
That last one—your GPU—is the deal-breaker. If you don’t have a CUDA-compatible NVIDIA card, you can run Fooocus on your CPU, but it’s gonna crawl. Like, “go-make-a-coffee-and-come-back” slow.
Recommended System Specifications
Now, if you actually want to enjoy using Fooocus (and trust me, you do), here’s what I’d recommend:
- CPU: Intel i7 or Ryzen 7 (the faster, the better)
- RAM: 16GB or more (32GB is a sweet spot)
- GPU: RTX 3060 or better (with 8GB VRAM minimum)
- Storage: SSD, because waiting is boring
With this setup, images will render in seconds, not minutes. You can crank up the resolution, generate batches, and still have resources left to run your music player or dozens of browser tabs.
| Operating System | GPU | Minimal GPU Memory | Minimal System Memory | System Swap | Note |
|---|---|---|---|---|---|
| Windows/Linux | Nvidia RTX 4XXX | 4GB | 8GB | Required | fastest |
| Windows/Linux | Nvidia RTX 3XXX | 4GB | 8GB | Required | usually faster than RTX 2XXX |
| Windows/Linux | Nvidia RTX 2XXX | 4GB | 8GB | Required | usually faster than GTX 1XXX |
| Windows/Linux | Nvidia GTX 1XXX | 8GB (* 6GB uncertain) | 8GB | Required | only marginally faster than CPU |
| Windows/Linux | Nvidia GTX 9XX | 8GB | 8GB | Required | faster or slower than CPU |
| Windows/Linux | Nvidia GTX < 9XX | Not supported | / | / | / |
| Windows | AMD GPU | 8GB (updated 2023 Dec 30) | 8GB | Required | via DirectML (* ROCm is on hold), about 3x slower than Nvidia RTX 3XXX |
| Linux | AMD GPU | 8GB | 8GB | Required | via ROCm, about 1.5x slower than Nvidia RTX 3XXX |
| Mac | M1/M2 MPS | Shared | Shared | Shared | about 9x slower than Nvidia RTX 3XXX |
| Windows/Linux/Mac | only use CPU | 0GB | 32GB | Required | about 17x slower than Nvidia RTX 3XXX |
How to Download Fooocus
Step-by-Step Guide to Downloading Fooocus
Here’s how to do it the right way:
- Head over to GitHub. Just search “Fooocus GitHub” and click the official repo. Or Click here ⬅️
- Find the latest release. There’s blue button to download and install “>>> Click Here to Install Fooocus <<<“
- Download the ZIP file. It’ll be something like
Fooocus-win.zip. - Don’t open it just yet. We’ll extract it next.

Tip: Bookmark the GitHub page. New updates drop all the time.
Extracting the Fooocus Files
Step-by-Step Guide to Extraction Process
- Right-click the ZIP file.
- Select “Extract to Fooocus\” or similar.
- Let it finish. It might take a few seconds depending on your drive speed.
- Inside the folder, you’ll see something like
run.bat,env, and a few model folders.


Don’t move stuff around unless you know what you’re doing. Fooocus expects certain files to be where they are.
Running Fooocus for the First Time
Running the Executable File
Alright, ready to roll? Here’s how:
- Double-click
run.bat. - A black terminal window will pop up. Let it do its thing.
- After a few seconds, your browser should open up with the Fooocus interface.
- If it doesn’t, copy the link from the terminal (usually
127.0.0.1:5000) and paste it manually.


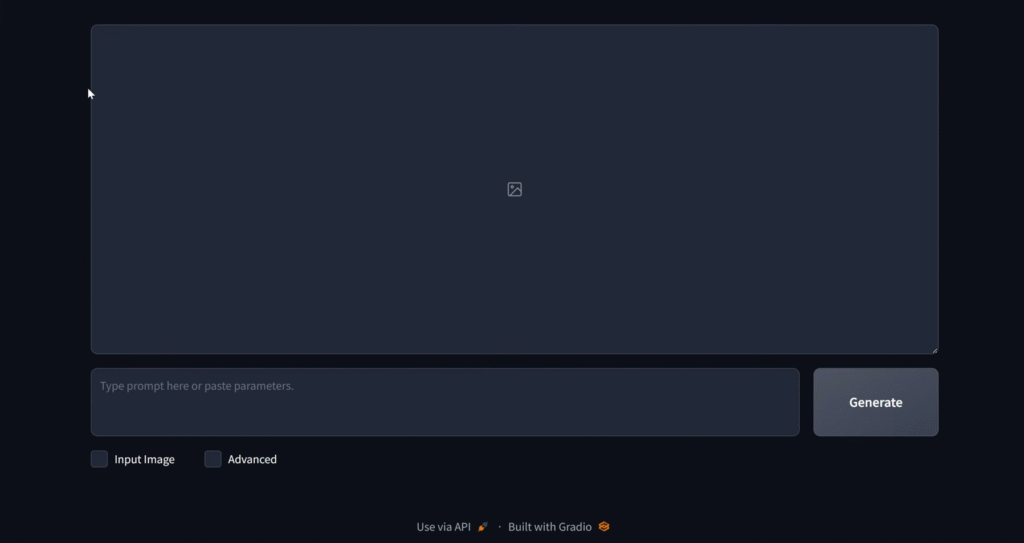
Congrats—you’re in.
Initial Configuration Settings
When Fooocus loads up in your browser, you’ll see a clean interface with a few buttons, some sliders, and a big box to type your prompt.
Before you dive in, here’s a few things worth tweaking:
- Output Folder: Decide where your images should go. I like keeping it somewhere like D:\Fooocus_Images for easy access.
- Resolution Settings: Start small (like 512×512) if you’re testing, and go bigger later.
- Model Selection: Stick with the default at first. Once you’re comfortable, you can try custom models.
Now, you’re ready to generate your first image. Type something into the prompt box—anything. “A cat wearing armor in a cyberpunk city.”
Click Generate… and watch the magic happen.
Troubleshooting Common Installation Issues
Stuff Happens—Here’s How to Deal
Look, even though Fooocus is one of the easiest AI tools to set up, sometimes things still go sideways. Maybe it throws an error. Maybe nothing happens. Maybe your PC gives you a death stare and acts like it’s never heard of Python before. Don’t panic—we’ve all been there.
Let’s walk through some of the most common “oh no” moments and how to fix them without flipping your desk.
“Missing DLL” Errors (a classic)

You double-click run.bat, and BOOM—you get hit with a message like:
“The code execution cannot proceed because MSVCP140.dll was not found.”
Awesome. Not.
This usually means your system’s missing some basic Windows components that Fooocus (or more accurately, Python) needs to do its thing. The fix is super simple:
Here’s what to do:
- Go to Google and search: “Microsoft Visual C++ Redistributable 2015–2022”
- Download it directly from Microsoft (not from weird download sites).
- Install both the x64 and x86 versions.
- Restart your PC.
That usually clears up 90% of these errors.
“CUDA not found” or “No GPU detected”
Ah yes, the GPU problem. Fooocus loves a good NVIDIA card with CUDA support. But if it can’t find yours, here’s what might be going on:
- You don’t have an NVIDIA GPU. (Yeah, that’s kind of required for GPU acceleration.)
- You haven’t installed CUDA or cuDNN properly.
- Your GPU drivers are outdated.
The fix:
- Update your NVIDIA drivers from the official website.
- Install the latest CUDA Toolkit (compatible with your version of PyTorch).
- Make sure PyTorch was installed with CUDA support—check their site for the right command.
If none of that works, you can still run Fooocus in CPU mode. It’s way slower, but hey—it works.
First Look: The Dashboard
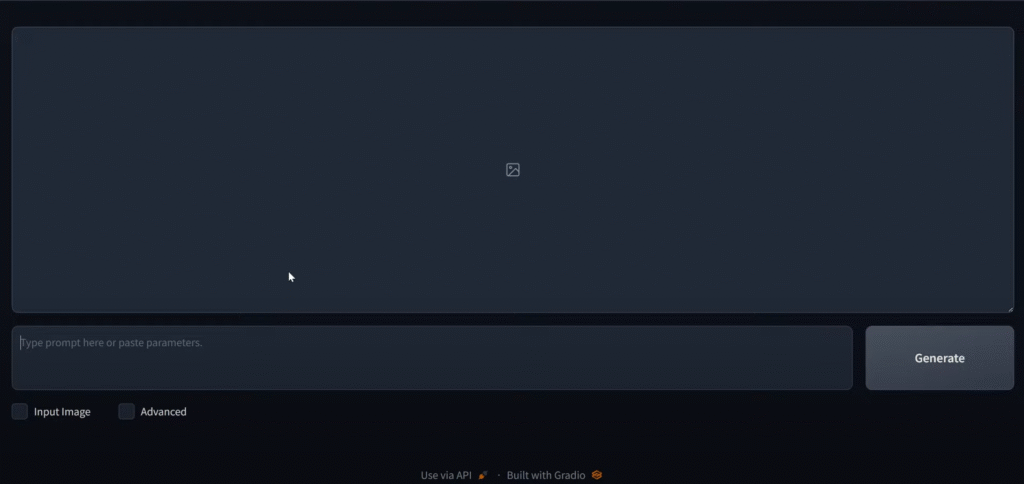
Alright, you made it through setup. Now you’re staring at the Fooocus interface in your browser.
Let’s break it down.
The Fooocus dashboard is simple—like, refreshingly simple. No walls of buttons, no confusing tabs, no “pro mode” switch you’re scared to touch.
Here’s what you’ll typically see:
- Prompt Box – This is the magic zone. Type your idea here, and Fooocus turns it into an image.
- Generate Button – Big, obvious, and satisfying to click.
- Preview Panel – Your image appears here once it’s ready.
- Settings Panel – Sliders and options for resolution, steps, guidance scale, etc.
- History Section – Tracks what you’ve made. Super handy if you forget what prompt gave you that one cool result.
And honestly, that’s all you need. You don’t need a course or a manual. Just start typing, hit generate, and play.
Menus and Panels—What’s What
Fooocus keeps everything tidy. There’s not much menu-hopping, but here’s what you should know:
- Models Tab: Want to switch from photorealism to something anime-style? This is where you load different AI models. You’ll find built-in options and maybe a way to load your own if you’re fancy.
- Styles & Filters: Pre-set styles you can slap onto your prompts—think of them like Instagram filters, but smarter.
- Settings (Gear Icon): This is where you pick folders, change the app theme, toggle GPU settings, etc. Go here if anything seems weird or if you want to fine-tune stuff.
- Output Area: Your creations land here. Each image usually includes its metadata—super helpful if you want to recreate or tweak later.
It’s honestly one of the cleanest UIs out there. It feels like the devs actually use it themselves—because everything is where it should be.
Make It Yours: Customizing the Layout
We have the option of Dark mode? Done, bigger image previews also,
Here’s what I’d suggest tweaking right away:
- Dark Mode – Find it in settings.
- Output Size Defaults – Set something like 768×768 or 1024×1024 depending on your GPU power.
- Prompt Templates – You can pre-fill prompts with certain structures. Super useful if you’re experimenting with different art styles or need consistency.
Everything auto-saves too, so once it’s dialed in, you’re golden.
First Project with Fooocus
Let’s Make Something!
You’ve waited long enough—it’s time to make your first image.
Here’s the no-pressure, 3-step process:
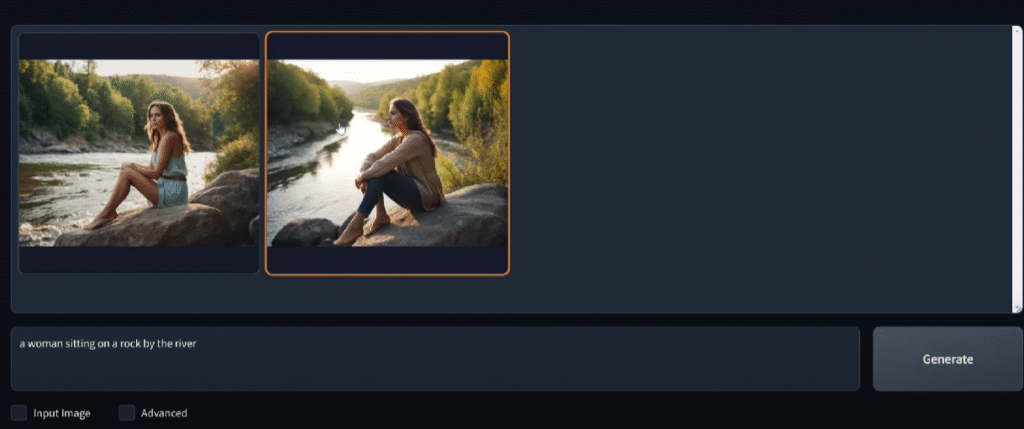
- Type your idea into the box. Try something like:
“a woman sitting on a rock by the river”
- Check your settings. Start with default resolution, maybe 30-50 steps, and leave everything else as-is.
- Click ‘Generate.’ Sit back and let Fooocus work its AI magic.

It’ll take a few seconds (or more, depending on your setup).
Using Styles, Filters, and Models
Want to level up that image? Try this:
- Pick a style preset—like “Studio Photography” or “Digital Painting.”
- Tweak the guidance scale—lower numbers = more freedom, higher = stricter prompt control.
- Switch the model—some models specialize in photorealism, others in anime, sketch, fantasy, etc.
Play around. This is your sandbox.
And don’t stress if your first few images are weird or don’t look right. AI art is as much about exploration as it is about results.
Keyboard Shortcuts
- Ctrl + Enter – Generate image (way faster than clicking)
- Ctrl + S – Save current image
- Ctrl + Z – Undo last generation
- Ctrl + Shift + E – Export all
You can even remap some of them if you’re picky like me. Check the config files or settings menu.
Alternatives to Fooocus (If You Wanna Shop Around)
Other AI Tools Worth Checking Out
Fooocus is awesome—but maybe you’re curious about what else is out there. Here are a few top-tier alternatives:
| Tool | Pros | Cons |
| Stable Diffusion | Fully customizable, endless models | More setup required, not beginner-friendly |
| MidJourney | Beautiful artistic outputs | Requires subscription, no offline use |
| DALL·E 3 | Super intuitive, natural prompts | Limited customization, smaller res |
| RunwayML | Great for video + AI workflows | Can get pricey, internet required |
Why Fooocus Might Still Be the One
Even with all those fancy options, Fooocus still holds its own because:
- It’s offline and free
- No install headaches
- Constantly improving
- And it’s just fun to use
But hey, there’s no rule that says you can’t use more than one tool. Lots of creators bounce between Fooocus for drafts, MidJourney for mood, and Photoshop for final polish.
Do what works for you.
Conclusion
Let’s recap real quick. You’ve:
- Downloaded Fooocus from here
- Extracted and set it up
- Launched it
- Made your first AI-generated image
- Learned how to troubleshoot and upgrade
That’s no small thing. Whether you’re here to experiment, build a portfolio, make memes, or just play around—Fooocus gives you the tools to do all that and more.
So open it up. Type in something wild. Make something only you could imagine. And if you love it? Share it. Help someone else find their groove.
Creativity’s contagious like that.
FAQs
What platforms does Fooocus support?
Right now, Fooocus is made for Windows (10/11). It can run on Linux with some tweaks, but Mac support is limited because of missing GPU compatibility.
Is Fooocus completely free?
Yeah, it’s totally free. Like, no “free trial” traps or annoying watermarks slapped across your art. You download it, set it up, and that’s it—no catch, no weird upsell later.
Can I use Fooocus offline?
Absolutely. Once you’ve downloaded the models and dependencies, Fooocus runs entirely offline. Great for privacy and working on the go.
My images take forever—why?
It’s probably running in CPU mode. Make sure you’ve got an NVIDIA GPU with CUDA and that PyTorch is set up to use it.
Where can I get more models?
The community has tons! Reddit, Discord, CivitAI, HuggingFace—all great places to grab new styles and specialized AI models.
Please don’t forget to leave a review. Explore more by joining me on BuyMeACoffee